Slideshow app supports integration with other systems via MQTT protocol. It can receive commands from remote systems and report its status and statistics back (full documentation is available on https://slideshow.digital/documentation/mqtt-integration/). The main advantage of this integration is that you can control multiple instances of Slideshow at the same time, even remotely across the world.
MQTT integration requires an external MQTT broker, to which Slideshow can connect. You can either install HiveMQ or Mosquitto brokers on your server, or use a cloud service, for example HiveMQ Cloud (https://www.hivemq.com/mqtt-cloud-broker/). HiveMQ Cloud is free for up to 100 client devices, meaning you can connect for example one management application and up to 99 devices with Slideshow app for free. It doesn’t support separate permissions for each credentials, so make sure you don’t share your MQTT username and password with anybody.
Below you can find a step-by-step tutorial of connecting Slideshow to HiveMQ Cloud and testing the connection by receiving status messages and issuing a command.
Setting up HiveMQ cloud
1. Create new account on https://console.hivemq.cloud
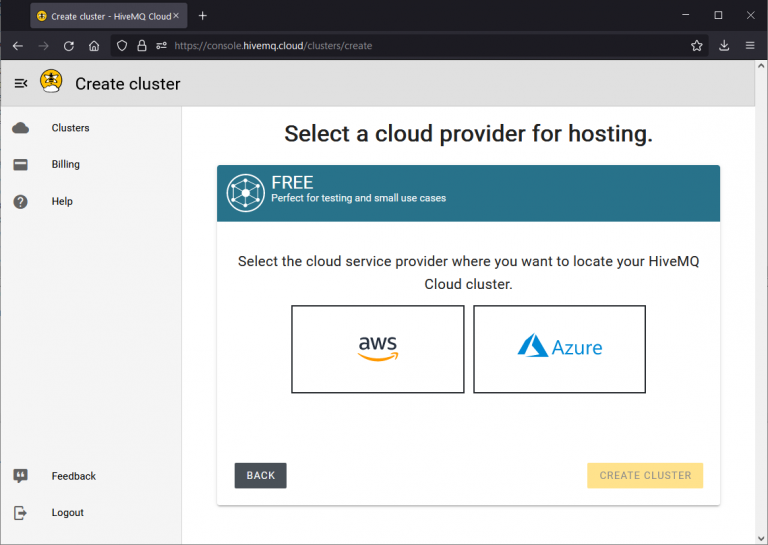
2. Select which provider you would like to use (there is almost no difference for the free tier)
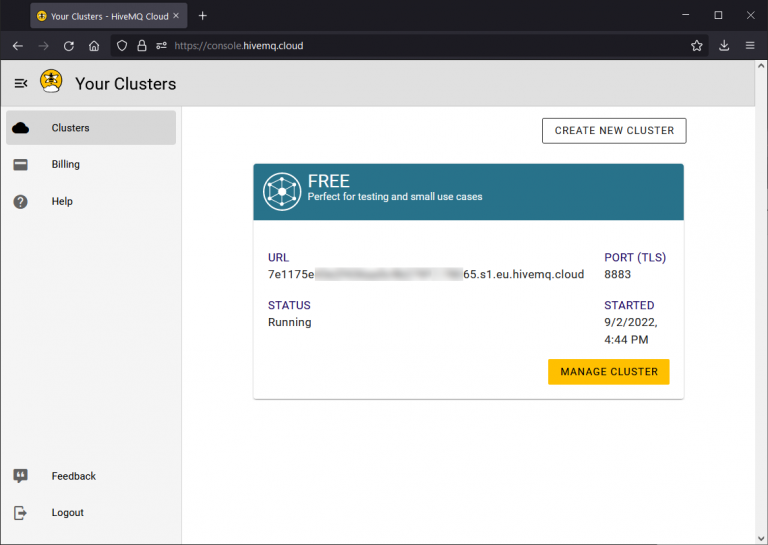
3. Note the connection details (URL and port) of the newly created cluster and click on Manage cluster
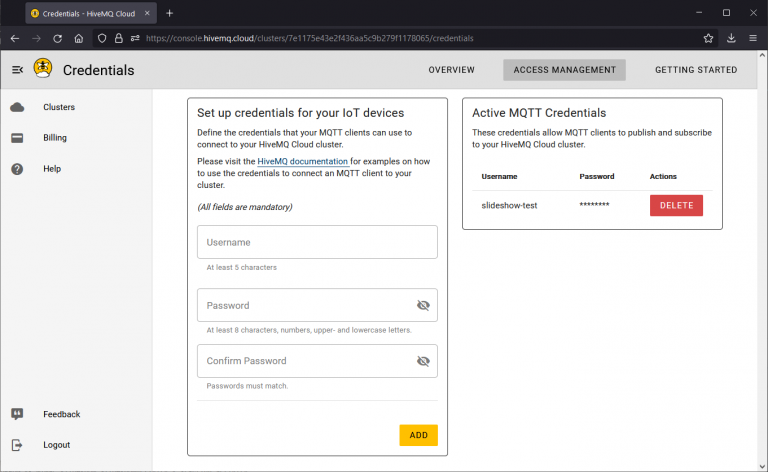
4. Click on Access management at the top and setup new credentials – username and password, which will be used by Slideshow to access the MQTT cluster.
Setting up MQTT in Slideshow
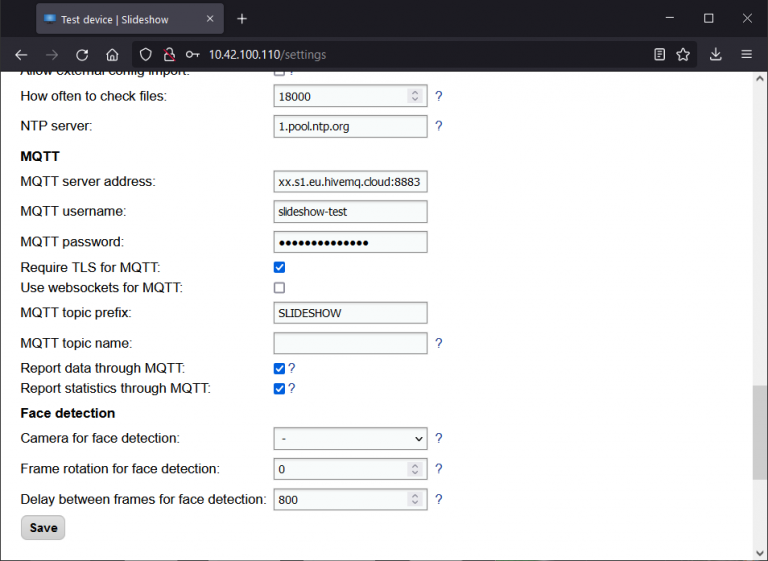
5. Open the web interface of Slideshow app, navigate to menu Settings – Device settings and adjust the following settings and click on Save
- MQTT server address: URL and port of the cluster, for example
xxxx.s1.eu.hivemq.cloud:8883 - MQTT username: from created credentials
- MQTT password: from created credentials
- Require TLS for MQTT: yes / checked
- Report data through MQTT: yes / checked
- Report statistics through MQTT: yes / checked
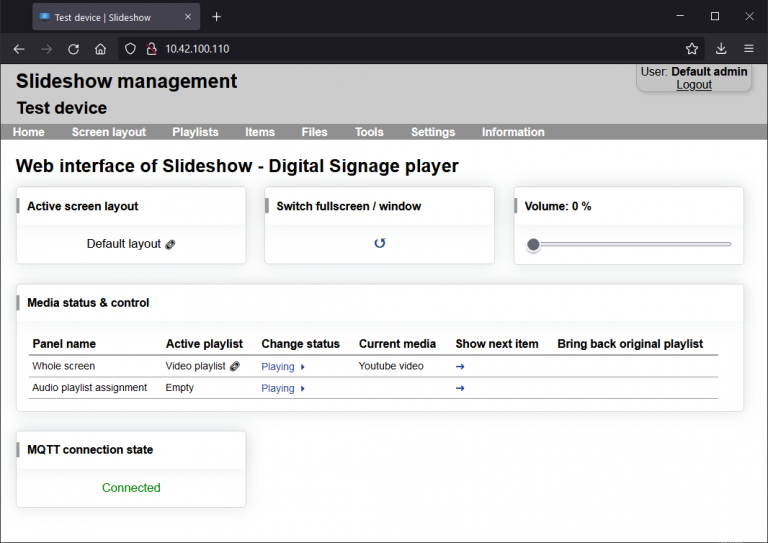
6. Reload Slideshow via menu Settings – Reboot / Reload – Reload application. After logging in back, check whether the MQTT connection state is “Connected” on the home page. If there is any other state, you can check the reason in the logs accessible via menu Information – Logs.
Testing the integration
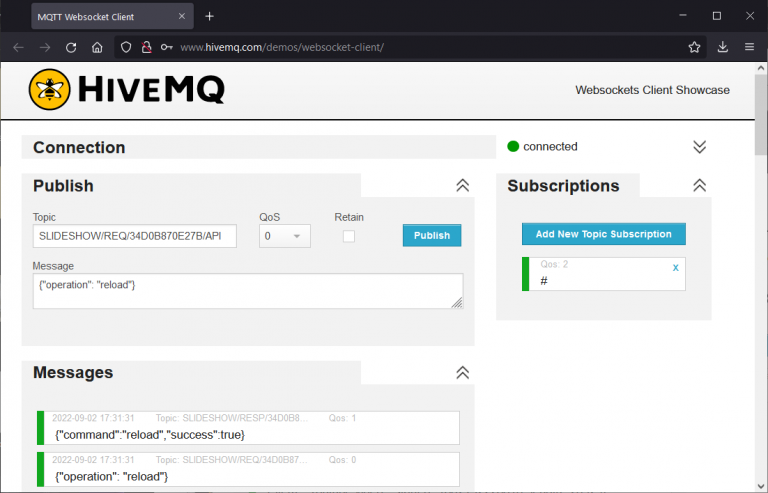
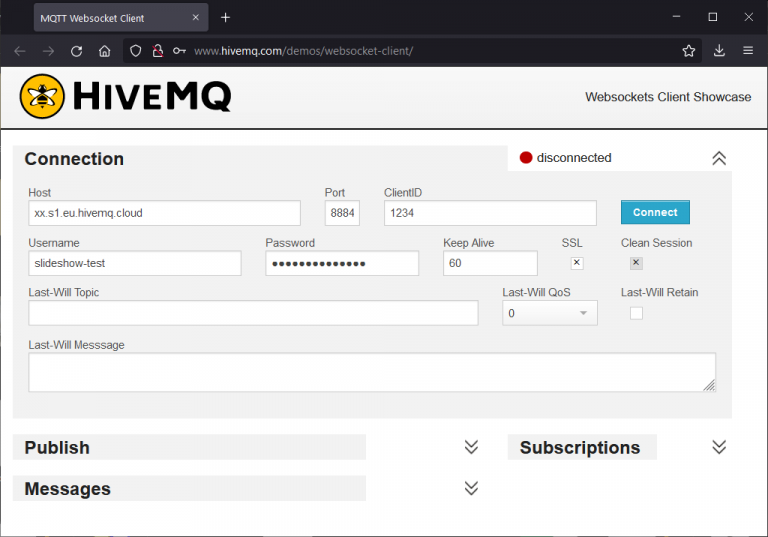
7. For testing the integration, we will use an online MQTT client which runs directly in web browser. Open http://www.hivemq.com/demos/websocket-client/, enter the connection details to your MQTT cluster and click on Connect. Make sure to enter the websocket port (usually 8884), as this client doesn’t support non-websocket communication.
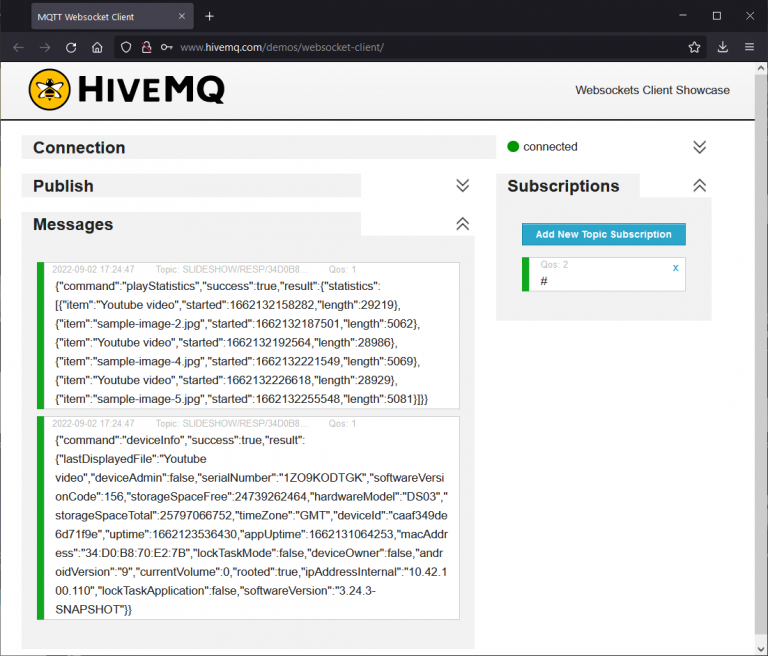
8. Click on Add New Topic Subscription, enter topic name # and click on Subscribe. This covers all topics created in this cluster.
9. Wait for up to 2 minutes and you will receive two messages from Slideshow app in the window, one with statistics about playback and one with information about the device and its status. Both are in JSON format and are computer-readable for subsequent processing.
10. To test a command, you can publish message {"operation": "reload"} to topic SLIDESHOW/REQ/xyz/API, where xyz is the MAC address of your Android device running Slideshow, all caps, without separators. You will get a success reply and on the screen of the Android device you will see that Slideshow app was restarted.