Slideshow app can display web pages and HTML files on the screen using a WebView component of Android.
The WebView component can be updated separately from Android system and Slideshow app by updating Android System WebView app from Google Play Store or other sources. Keeping the WebView component up-to-date is important for displaying web pages that require the most recent version of the web browser. The default WebView component is based on Chrome browser, you can change the provider via Android settings – Developer options – WebView implementation.
User-Agent HTTP header used for requesting external web pages can be changed with a setting User agent for HTTP requests. The default User-Agent based on the actual browser core (which is used if the setting is empty) is the best option for most use-cases.
Displaying web page using URL file
Entire web pages from the internet can be displayed using a file with .url file extension. If Slideshow detects such a file, it will read the URL address and display the containing website on the screen.
Format of the .url file can be:
- Plain text file with a single line containing the URL address of the website
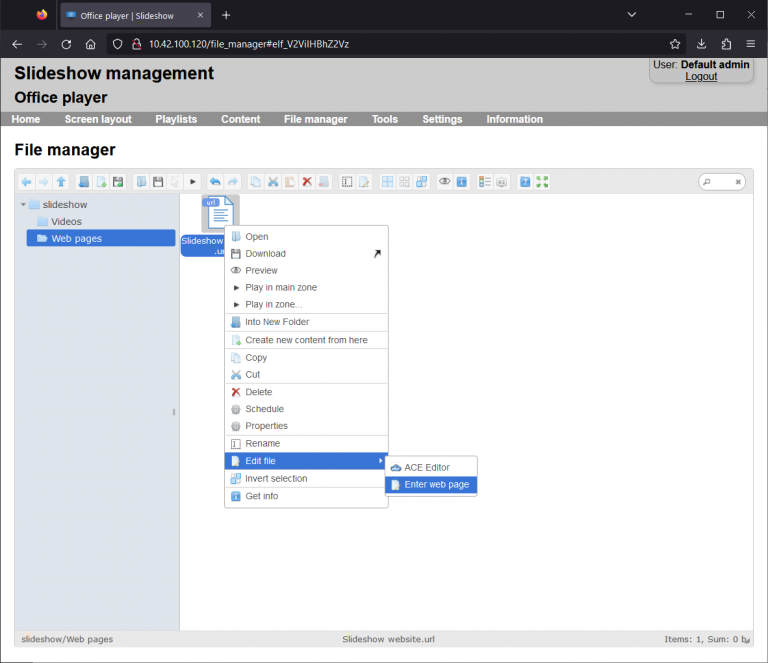
- URL file created by File manager in Slideshow’s web interface (right click – New file – URL) and edited (right click – Edit file – Enter web page)
- URL file created in Windows (see https://fileinfo.com/extension/url)
Online websites can be displayed on the screen only if the device running Slideshow app is connected to the internet. Only pages which are successfully loaded are displayed on the screen. If you are an IT specialist, you can use this functionality for example for displaying Zabbix or Grafana dashboards.
Password-protected web pages can be displayed using two methods:
- Pages protected with HTTP basic authentication can be displayed by entering the URL in format
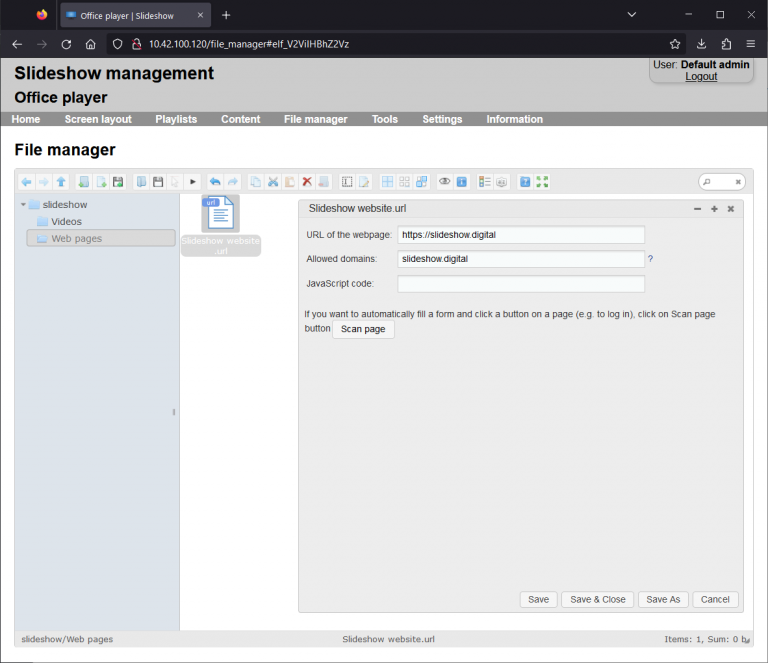
https://username:password@webpage.domain, for examplehttps://user:pass123@example.com. In case the username or password contains a special character, it has to be URL-encoded. - Pages protected with a login form, you can use the “Enter web page” editor in File Manager. Click on the Scan page button, fill in the details and click on Save. As there are many various methods for login form, this method might not work on all pages.
,). In case you fill some domains, Slideshow will allow redirecting only to links in the listed domains, including their subdomains. Loading external JavaScript, CSS and font files is not restricted by this domain list.Displaying HTML file
Slideshow can directly render files with .html file extension. The HTML file can contain regular HTML code, including iframes and JavaScript, which gives you vast posibilities. The exact supported set HTML/CSS/JavaScript features depend on the version of Android System WebView app.
The default background is transparent, in order to allow HTML overlay. If you would like to have a non-transparent background, add style="background-color: white" to tagorin the HTML file.
HTML files can be also directly edited in a WYSIWYG editor via the web interface – menu File Manager – right click a HTML file – Edit file – CKEditor. Other editors are available as well, including plain-text editor TextArea.
Displaying HTML widgets
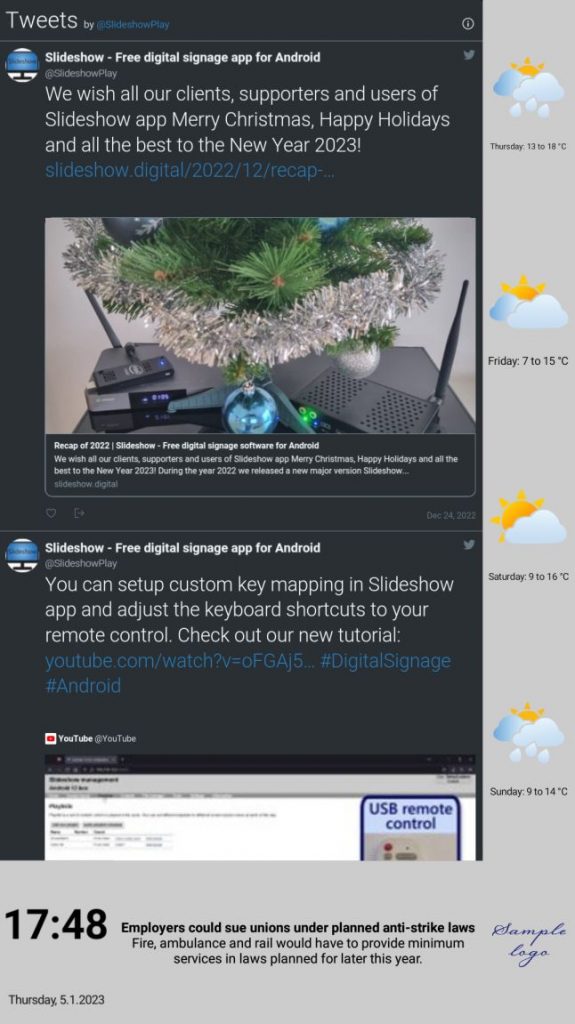
As an example, using Twitter Publish, you can create an HTML snippet with your Twitter feed, save it as an HTML file to Slideshow and display the Twitter feed on the screen. You can find example with Slideshow’s Twitter bellow: content of the HTML file on the left and the result as rendered by Slideshow app on the screen on the right
<html>
<style>body, html {margin: 0}</style>
<body>
<a class="twitter-timeline" data-lang="en" data-width="960" data-height="1080" data-theme="dark" href="https://twitter.com/SlideshowPlay?ref_src=twsrc%5Etfw">Tweets by SlideshowPlay</a>
<script async src="https://platform.twitter.com/widgets.js" charset="utf-8"></script>
</body>
</html>


